Welcome to the world of creating a basic REST API using deno, the most promising server side language based on the chrome v8 runtime (alternative to node.js).
What is Deno?
If you are familiar with Node.js, the popular server-side JavaScript ecosystem, then Deno is just like Node. Except deeply improved in many ways.
- It is based on modern features of the JavaScript language
- It has an extensive standard library
- It has TypeScript at its core, which brings a huge
advantage in many different ways, including a
first-class TypeScript support (you don’t have to
separately compile TypeScript, it’s automatically
done by Deno) - It embraces ES modules
- It has no package managerIt has a first-class await
- It as a built-in testing facility
It aims to be browser-compatible as much as it
can, for example by providing
Will it replace Node.js?
No. Node.js is everywhere, well established, incredibly well
supported technology that is going to stay for decades.
Deno can be treated as an alternative language to node.js.
Before we delve in to the code, let’s take a look at the shape of the api that we will be creating.
For our demo code we will be creating a basic backend with inmemory storage for our “Diagramming Application / Idea Visualization Application”.
Info:
Deno uses Typescript by default. We can also use JavaScript if we wish. In this article we will stick with TypeScript. So, if your TypeScript is rusty, please do a quick revision.
Data Structure
The data structure that represents one record consist of the follow attributes.
{
   id,
   type,
   text
}
And our data store on the backend is our simple plain old array as shown below.
[
{
  id: "1",
  type: "rect",
  text: "Idea 2 Visuals",
},
{
  id: "2",
  type: "circle",
  text: "Draw",
},
{
  id: "3",
  type: "circle",
  text: "elaborate",
},
{
  id: "4",
  type: "circle",
  text: "experiment",
},
]
Our objective is to create the REST API to do the CRUD operation on the above array (Feel free to put a backend database if curious).
Let’s experiment with the api first, so that you get a feel of the backend we are coding.
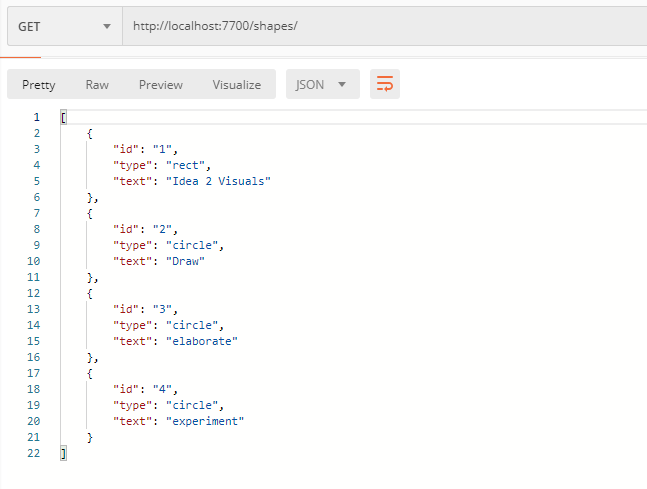
Get Request
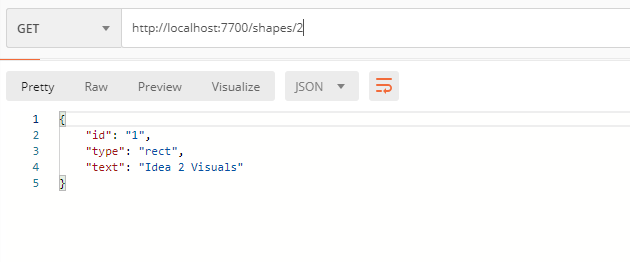
Get by ID
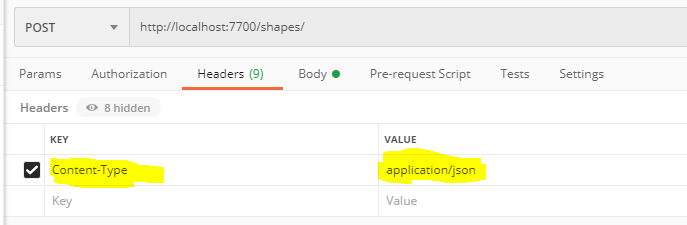
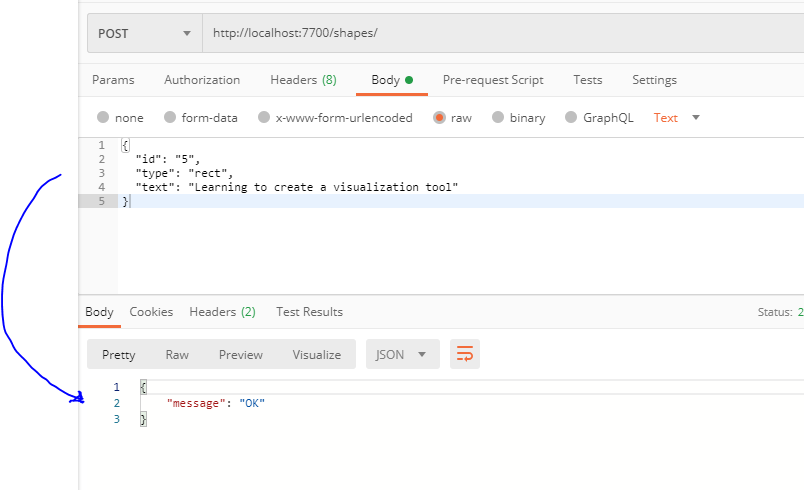
Add a Shape (POST)
Set the content-type to application/json as shown (if you are are using postman or other tools)
Setup the post body
Lets query all shapes to verify whether our newly added record is successfully saved or not.
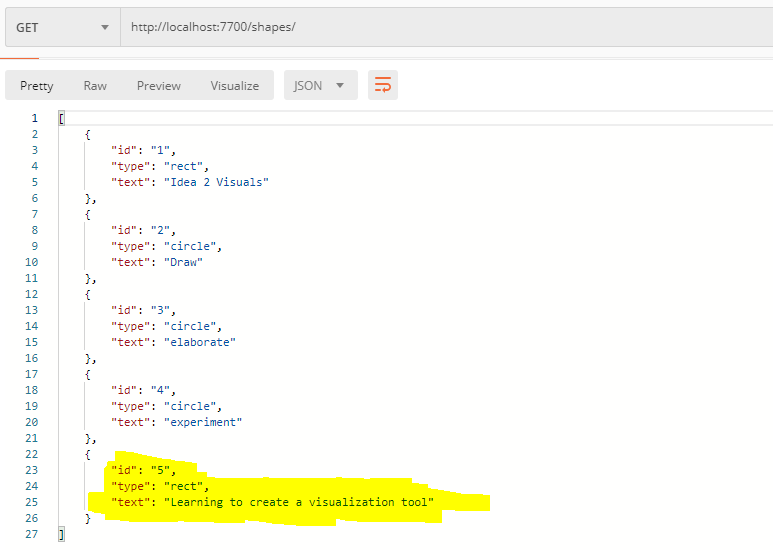
Update a shape (PUT)
First let’s verity the shape with and ID of 2.

Don’t forget to setup the content type (refer POST section above)
Let’s issue the PUT request to update.

Let’s verify the update with a get request

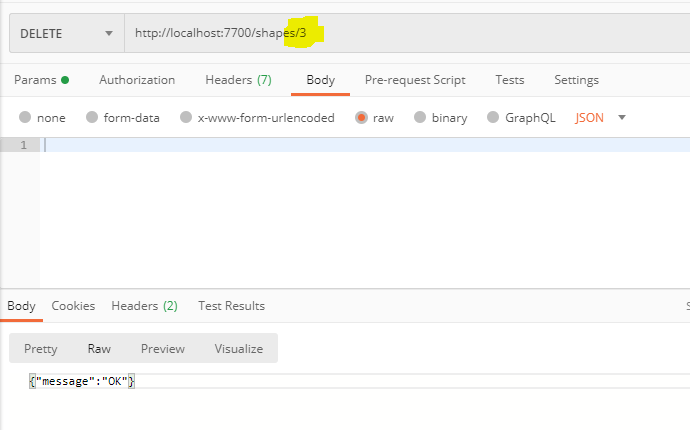
Delete
Let’s delete the record with the ID = 3. Observe the URL parameter we are passing.
Let’s get the code rolling
First’ install the deno from https://github.com/denoland/deno_install
One installed you can verify the installation by running the below command.
denoThe above command should bring up the REPL. Get out of the REPL for now.
A quick deno magic. You can run the program from the URL. For e.g. try the below code.
deno run https://deno.land/std/examples/welcome.tsAnd you will get the output as shown below.

Let’s build our REST API
To build our API we will use the OAK framework and TypeScript. The Oak is a middleware inspired by Koa framework.
Oak: A middleware framework for Deno’s net server 🦕
https://github.com/oakserver/oak
Fire up your favorite editor and create an app.ts file (as we are using TypeScript) and create the below three files.
- app.ts
- routes.ts
- controller.ts
The app.ts file will be the entry point for our application. The routes.ts defines the REST routes and the controller.ts contains the code for the routes.
Let’s begin by importing the Application object from oak.
import { Application } from 'https://deno.land/x/oak/mod.ts'The Application class wraps the serve() function from the http package. It has two methods: .use() and .listen(). Middleware is added via the .use() method and the .listen() method will start the server and start processing requests with the registered middleware.
Let’s setup some environment variables to be used by the application, specifically HOST and PORT.
const env = Deno.env.toObject()
const HOST = env.HOST || '127.0.0.1'
const PORT = env.PORT || 7700
The next step is to create an instance of the Application and start our server. Though note that our server will not run because we will need a middleware to process our request (as we will be using Oak)
const app = new Application();
// routes config goes here

console.log(`Listening on port ${PORT}...`)
await app.listen(`${HOST}:${PORT}`)
Here we create a new Application instance and listen on the app object at specific host and port.
The next step is create the routes and the controller (NOTE: The controller is not mandatory, but we are segregating the code as per responsibility)
Routes
The route code is pretty self explanatory. Do note that to keep the cod clean the actual request/response handling code is loaded from controller.ts.
NOTE:
deno uses URL for importing modules.
import { Router } from 'https://deno.land/x/oak/mod.ts'
import { getShapes, getShape, addShape,  updateShape, deleteShape
} from './controller.ts'

const router = new Router()
router.get('/shapes', getShapes)
      .get('/shapes/:id', getShape)
      .post('/shapes', addShape)
      .put('/shapes/:id', updateShape)
      .delete('/shapes/:id', deleteShape)

export default router
Here we first import the {Router} from the oak package. To make this code work we have to create the getShapes, getShape, addShape, updateShape, deleteShape mehods in or controller.ts which we will shortly do.
Then we create an instance of the router and hook onto the get, post, put and dleete method. Dynamic query string parameters are denoted by “:”.
And finally we export the router so that other modules can import it.
Now before we start with the final piece, controller.ts, let fill in the remaining part of the code for our app.ts as shown below.
import { Application } from 'https://deno.land/x/oak/mod.ts'
import router from './routes.ts'

const env = Deno.env.toObject()
const HOST = env.HOST || '127.0.0.1'
const PORT = env.PORT || 7700

const app = new Application();

app.use(router.routes())
app.use(router.allowedMethods())

console.log(`Listening on port ${PORT}...`)
await app.listen(`${HOST}:${PORT}`)
Here we import routes file using the import statement and passing in relative path.
import router from './routes.ts'Then we load up the middleware by the below method call
app.use(router.routes())
app.use(router.allowedMethods())
allowedMethods
The allowedMethods needs to passed as per oak documentation. It takes a parameter as well which can be further customized.
Let’s start with the controller code.
controller.ts
We begin by creating the interface for our model. We will call it as IShape as we are dealing with drawing/diagramming application.
interface IShape {
  id: string;
  type: string;
  text: string;
}
Let’s simulate an in-memory storage. And ofcouse array shines here. So, we will create an array with some sample data.
let shapes: Array<IShape> = [
  {
    id: "1",
    type: "rect",
    text: "Idea 2 Visuals",
  },
  {
    id: "2",
    type: "circle",
    text: "Draw",
  },
  {
    id: "3",
    type: "circle",
    text: "elaborate",
  },
  {
    id: "4",
    type: "circle",
    text: "experiment",
  },
]
Now, before we begin with the main API code, let’s code and helper method to fetch record using ID as the parameter. This method will be used in the delete and update method.
// Helper method to find record by id
const findById = (id: string): ( IShape | undefined ) =>{
  return shapes.filter(shape => shape.id === id )[0]
}
Here we simply use the good old array filter method. But as you may be aware filter method always returns and array, even if there is only one outcome we use the [0] to grab the first element.
TIP
It’s a good idea to have a consistent method naming and return value convention for our methods. findById in most frameworks and library is known to return only one record/block.
Now having done the preliminary work let’s begin our API by implementing the “GET” method. If you recollect from our router discussion a request to /shapes url is expecting a method getShapes to be invoked.
A note on request/response
By default all Oak request has access to the context object. The context object exposes the below important properties.
- app – A reference to the Application that is invoking this middleware.
- request – The Request object which contains details about the request
- response – The Response object which will be used to form the response sent ack to the requestor/client.
- params – Added by the route
- state – A record of application state
GET /shapes
The getShapes method is quite simple. If we had a real database here then you will simply fetch all the records (or records as per paging) in this method.
But in our case the array, shapes, is the data store. We return data back to the caller by setting the response.body to the data that is to be returned, there the complete “shapes” array.
const getShapes = ({ response }: { response: any }) => {
  response.body = shapes
}
response
The response object is passed by the http/oak framework to us. This object will be used to send the response back to the requestor. It also passes a request object, which we will shortly examine.
GET /shapes/2
A good API server should also enable to fetch only selective record. This is where this second GET method comes into play. Here we pass in the parameter, id, as query string to the /shapes route.
const getShape = ({ params, response }: { params: { id: string }; response: any }) => {
  const shape: IShape | undefined = findById(params.id)
  if (shape) {
    response.status = 200
    response.body = shape
  } else {
    response.status = 404
    response.body = { message: `Shape not found.` }
  }
}
In the getShape method we destructure the params and a response object. If the shape is found we send a 200OK status along with the shape in response body. Otherwise a 404 error.
POST /shapes
In the REST world to create a new resource/record we use the POST method. The POST method receives its parameter in the body rather than the URL.
Let’s take a look at the code.
// Create a new shape
const addShape = async ({request, response}: {request: any; response: any}) => {
  const body  = await request.body()
  const shape: IShape = body.value
  shapes.push(shape)
  response.body = {
    message: "OK"
  }
  response.status = 200
}
Note, we use await request.body() as the body() method is async. We grab the value and push it back to the array and then respond with an OK message.
PUT /shapes (The update)
The PUT/PATCH method is used to update a record/entity.
// Update an existing shape data
const updateShape =  async ({ params, request, response }: { params: { id: string }; request: any; response: any }) => {
  let shape: IShape | undefined = findById(params.id)
  if (shape) {
    const body = await request.body()
    const updates: { type?: string; text?: string } = body.value
    shape = {...shape, ...updates} // update

    // Update the shape back to array
    shapes = [...shapes.filter(s => s.id !== params.id), shape]

    response.status = 200
    response.body = {
      message: "OK"
    }
  } else {
    response.status = 404;
    response.body = {
      message: "Shape not found"
    }
  }
}
The update method seems quite involved but is quite simple. To simply let me outline the process.
- Grab the entity/resource to be edited by its ID
- If found get the body of the request that contains updated data in JSON form (set content-type: application/json in the request header)
- Get the udpated hash values.
- Merge the currently found shape object with the updated value.
- At this point the “shape” variable contains the latest updates.
- Merge the updated “shape” back to the “shapes” array.
- Send back the response to the client.
And now finally let’s take a look the the DELETE method.
DELETE (/shapes)
The delete method is quite simple. Grab the shape to be deleted by using the ID. In this case we just filter out the record which is deleted.
// Delete a shape by it's ID
const deleteShape = ({ params, response }: { params: { id: string }; response: any }) => {
  shapes = shapes.filter(shape => shape.id !== params.id)
  response.body = { message: 'OK' }
  response.status = 200
}
NOTE: In real world project, do the needed validations on the server.
Run the server
deno run --allow-env --allow-net app.tsNOTE: For security reasons, Deno does not allow programs to access the network without explicit permission. To allow accessing the network, use a command-line flag:
And you have a running REST API server in deno. 🦕
The complete source code is at https://github.com/rajeshpillai/deno-inmemory-rest-api
Hope you liked this post. Please feel free to share your thoughts and recommendation for future posts.