This post will help you setup modern JavaScript development environment using Babel and Webpack.
What is Webpack?
Webpack is a module bundler. It allows you to write your code in as many separate files as you need and creates a single output file for you to import into your html file. In short Webpack can combine multiple files into single one (and lot of other options are there)
You can view the getting started guide [here]((https://webpack.js.org/guides/getting-started/).
What is Babel?
Babel enables you to write code using all the latest and greatest features of ECMAScript and converts it to backwards compatible code for older environments that may not support all of the newest features. So, without Babel, your code is not guaranteed to work in major browsers. Babel is one of that holy grail which help solves the problem of this works in one browser and not other (well almost).
You can view the usage guide here.
Project Structure
Well this being free land, you are free to setup your project in any manner you deem fit. But here is one widely used approach.
Step 1: File structure
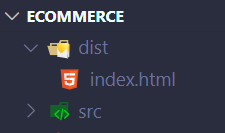
Create a dist folder for your distribution code. Keep your index.html in this folder and write your code in the src folder. Later when Webpack creates a bundle file, it will end up in the dist folder. You can also name this folder anything you wish, but do remember this name.
For e.g. my project folder name is “ECOMMERCE”.
Step 2: Initialize your project
In your project folder run the below command to create package.json file.
// Setup package.json

npm init -y   (OR yarn init)
Step 3: Add Webpack dependencies
Run the below commands to install webpack dependencies.
// using yarn
yarn add webpack webpack-cli webpack-dev-server --dev

// OR using npm
npm install webpack webpack-cli webpack-dev-server --save-dev
webpack-dev-server allows you to serve the webpack bundle and also give a local server from where your static files could be served.
Step 4: Create webpack.config.js file in your root project-folder
const path = require('path');
module.exports = {
 "mode": "none",
 "entry": "./src/index.js",
 "output": {
   "path": __dirname + '/dist',
   "filename": "bundle.js"
 },
 devServer: {
   contentBase: path.join(__dirname, 'dist')
 }
}
Step 5: Create index.html and index.js
Create index.html in your “dist” folder and add
<script src="bundle.js"></script>to the bottom of the <body>.
Create “index.js” in your src folder. Add add a console.log for test purpose.
|_ /dist
    |_ index.html
|_ /src
    |_ index.js
|_ package.json
|_ webpack.config.js
Step 6: Add Style Loaders
Style and CSS loaders are needed for importing CSS files into javascript files.
// npm install
npm install --save-dev css-loader style-loader

// OR using yarn install
yarn add --dev css-loader style-loader
Now, add the sytle modules to the webpack.config file.
const path = require('path');

module.exports = {
 "mode": "none",
 "entry": "./src/index.js",
 "output": {
   "path": __dirname + '/dist',
   "filename": "bundle.js"
 },
 devServer: {
   contentBase: path.join(__dirname, 'dist')
 },
 "module": {
   "rules": [
     {
       "test": /\.css$/,
       "use": [
         "style-loader",
         "css-loader"
       ]
     },
   ]
 }
};
Create a folder called “styles” and add a css file inside. You can name it anything, I am calling it as “main.css”. The folder structure will look like below.
|_ /dist
    |_ index.html
|_ /src
    |_ index.js
    |_ /styles
        |_ main.css
|_ package.json
|_ webpack.config.js
Add some test code to the CSS file.
body {
  background: blue;
}
Connect your index.js file with the styles.
import './styles/main.css';Step 7: Install Bebel dev dependencies
// using npm
npm install --save-dev babel-loader @babel/core @babel/preset-env @babel/plugin-transform-runtime

// OR using yarn
yarn add babel-loader @babel/core @babel/preset-env @babel/plugin-transform-runtime --dev
@babel/preset-env is used so you don’t have to worry about polyfills for different ES versions.
The @babel/plugin-transform-runtime is needed for various async features support in your application.
Step 8: Add the babel-loader to your webpack.config file.
const path = require("path");

module.exports = {
  "mode": "none",
  "entry": ["./src/index.js"],
  "output": {
    "path": __dirname + '/dist',
    "filename": "bundle.js"
  },
  "devServer": {
    contentBase: path.join(__dirname, 'dist'),
    port: 3000
  },
  "devtool": "source-map",
  "module":{
    "rules":[
      {
        "test": /\.css$/,
        "use": [
          "style-loader",
          "css-loader"
        ]
      },
      {
        "test": /\.js$/,
        "exclude": /node_modules/,
        "use": {
          "loader": "babel-loader",
          "options": {
            "presets": [
              "@babel/preset-env"
            ],
            "plugins":[
              ["@babel/transform-runtime"]
            ]
          }
        }
      }
    ]
  }
}
Step 9: Add scripts to package.json to start the application and bundling process.
The package.json will look like below.
{
  "name": "ecommerce",
  "version": "1.0.0",
  "description": "",
  "main": "index.js",
  "scripts": {
    "build": "webpack",
    "dev-server": "webpack serve"
  },
  "keywords": [],
  "author": "",
  "license": "ISC",
  "devDependencies": {
    "@babel/core": "^7.12.10",
    "@babel/plugin-transform-runtime": "^7.12.10",
    "@babel/preset-env": "^7.12.11",
    "babel-loader": "^8.2.2",
    "css-loader": "^5.0.1",
    "style-loader": "^2.0.0",
    "webpack": "^5.14.0",
    "webpack-cli": "^4.3.1",
    "webpack-dev-server": "^3.11.2"
  },
  "dependencies": {
    "@babel/runtime": "^7.12.5"
  }
}
Now you can run your dev server by running the below command.
npm run dev-server

// or using yard
yarn dev-server