This blog will take you through the step-by-step single server Installation of IBM Planning Analytics Workspace Version 2.0.47 in Windows 10Pro Operating system. Nick name for IBM Planning Analytics workspace is ‘PAW’.

Pre-Requisite
Tip: One of the important pre-requisite for IBM Planning Analytics workspace (PAW) is Docker. PAW is a Dockerized Micro Services and Databases.
For installation it requires both hardware and software to be configured.
Hardware Requirement:
– 4 Core/ 16GB RAM (100 named users) or 8 Core/ 32GB RAM (upto 1000 named users)
– 500GB Hard drive
Software Requirement:
– Install IBM Planning Analytics
– TM1 Web: should be up and running
– TM1 Data: atleast one data server should be up and running
– Authentication can be TM1 in-built or CAM authentication
– Docker Toolbox (for windows 10Pro)
– MS Office 2016 or higher (optional)
– Chrome/ Firefox browser
– Oracle VirtualBox
– Enable Hyper-V (required for Docker installation only)
Tip: Things to remember anti-virus software should support windows 10pro and Docker Toolbox.
Important URL:
Oracle Virtualbox
Download from https://www.virtualbox.org/
Docker Toolbox
Download from https://docs.docker.com/toolbox/toolbox_install_windows/
Hardware Configuration:
– Enable Virtualization
Port Required for Configuration:
| Port | Description |
| 80 | HTTP Port required for configuration of IBM PA Gateway |
| 443 | HTTPS Port required for configuration of IBM PA Gateway |
| 8888 | By default, Planning Analytics workspace administration tool is accessible on this port |
Step-by-Step Installation of PAW
Now, Let’s Start with the Installation
Step 1: Install of Docker Toolbox
Tip: Docker for windows runs on 64bit Windows 10Pro
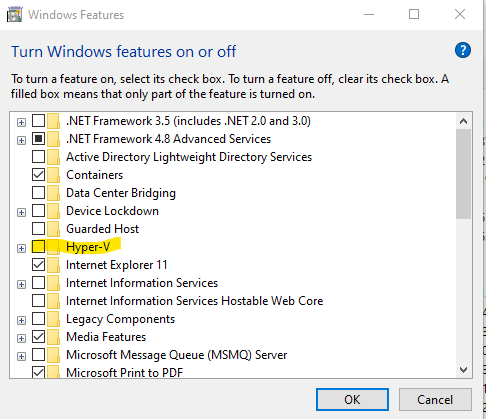
Step 1.1: Enable Microsoft’s Hyper-V
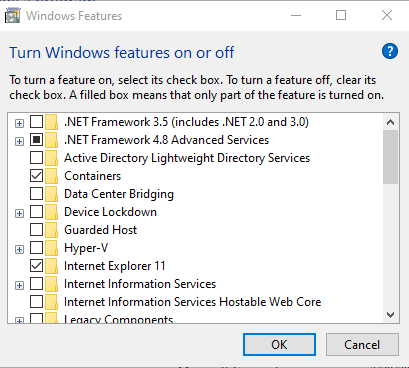
As seen in pre-requisite for Docker Toolbox, we need to enable Microsoft’s Hyper-V in windows 10Pro. To enable Microsoft’s Hyper-V follow below steps:
- Go to
Start--> Control Panel --> Programs and Features --> Turn on windows features on or off - Enable
Hyper-V. Once Hyper-V is enabled restart windows.
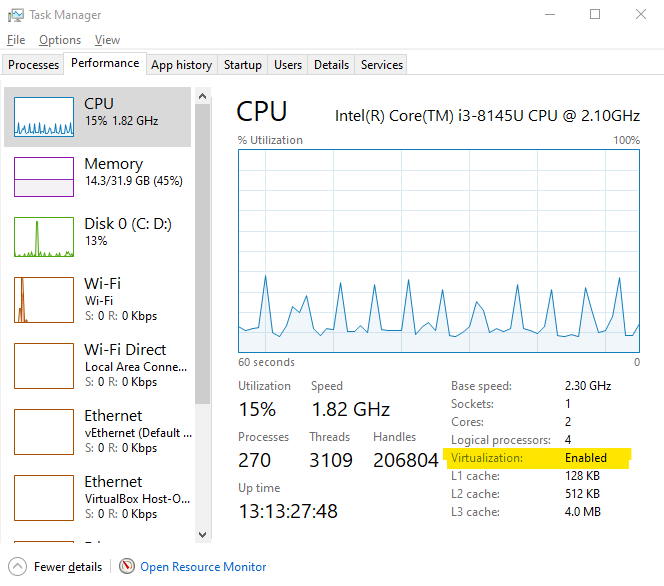
Step 1.2: Enable Virtualization in Hardware
To enable virtualization follow the hardware manufacturer’s instructions for enabling.
To verify if the virtualization is enabled:
Choose Start --> Task Manager and Navigate to Performance Tab. Under CPU you should see the following:
Step 1.3: Download and Install Docker Toolbox
In this section, you will install Docker Toolbox software. The installation will add following components:
– Docker Client for windows
– Oracle VM VirtualBox
– Docker Toolbox management tool and ISO
Tip: If you have Virtual Box running, you must shut it down before starting the installation
- To download latest version of Docker Toolbox, go to Toolbox Releases and download the latest release v19.03.1 file.
- Install Docker Toolbox by double-clicking the installer. This starts the setup dialog. If windows security prompts you to allow the program to make change, choose Yes. The system displays the setup wizard.
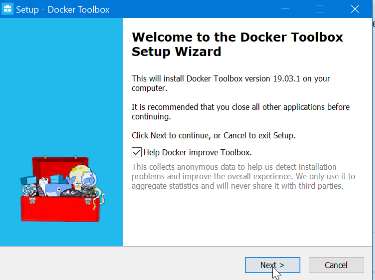
- Click Next to accept all the defaults and then Install. This takes few minutes to install all the components.
- On completing the installation this shows a message as successful.
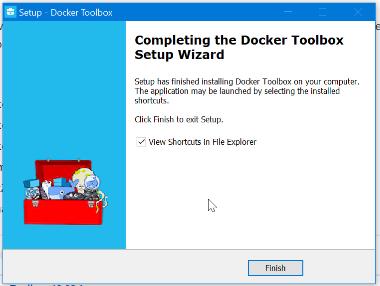
Uncheck 'View shortcuts in File Explorer'and Click Finish button.
Step 1.4: Verify Installation
The installer adds Docker Quickstart Terminal, Oracle Virtual Box, and Kitematic to your Applications folder. Now start the Docker Toolbox and run some simple commands:
- On the Desktop, launch
Docker Quickstart Terminal.
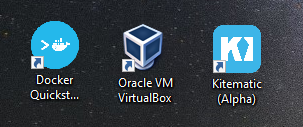
- Click the Docker Quickstart icon to launch a pre-configured Docker Toolbox terminal.
If the system displays a User Account Control prompt to allow VirtualBox to make changes to your computer. Choose Yes.
The terminal does several things to set up Docker Toolbox for you. When it is done, the terminal displays the$prompt.
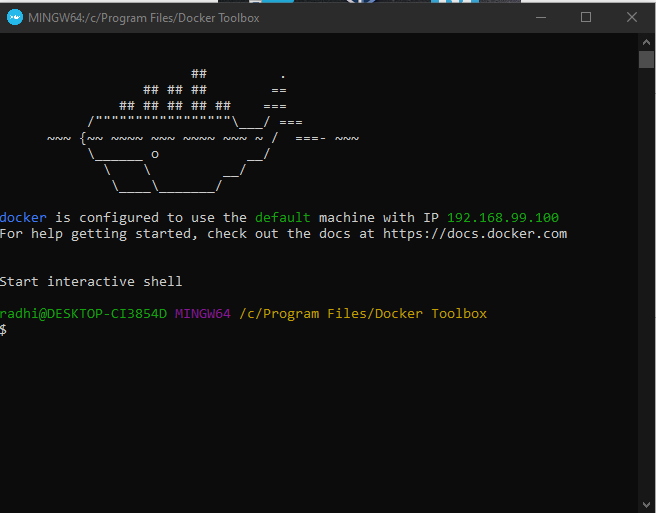
bash environment instead of the standard Windows command prompt. The bash environment is required by Docker.- To activate the terminal, click your mouse next to
$prompt. - Type the
docker --versioncommand and press Enter

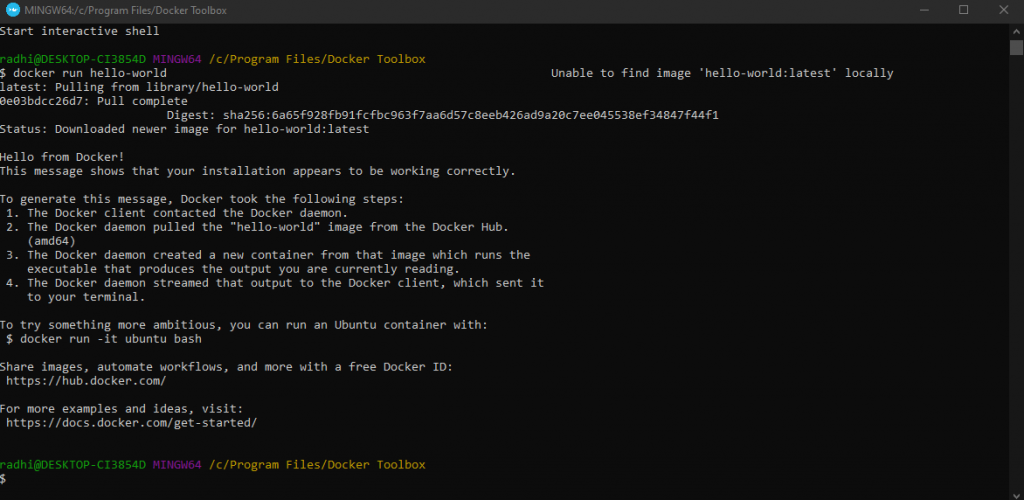
- Type the
docker run hello-worldcommand and press Enter
The command does some work for you, if everything runs well, the command’s output looks like this:
- Type the
docker image lscommand and press Enter

- Type the
docker-machine lscommand and press Enter
When you install docker it will by install aDefaultmachine in virtual box.

- Currently you will see
Defaultmachine is in running state. You need to stop this machine.
Type thedocker-machine stop defaultcommand and press Enter

Tip: If there are more than one docker-machine are created ensure that you remove the machine or stop the machine before proceeding further.
To remove the docker-machine use the below command:
docker-machine rm <machine-name>
Step 1.5 Configure Docker-Toolbox for PAW
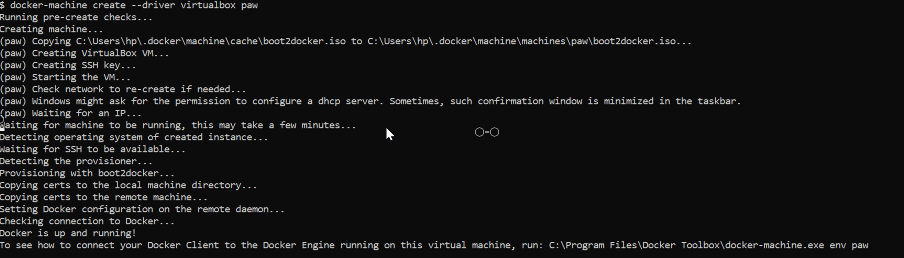
To configure IBM Planning Analytics Workspace, we need a docker-machine by the name ‘paw’. So now let’s create a docker-machine:
- Type the
docker-machine create --driver virtualbox pawcommand and press Enter
- Type the
docker-machine lscommand and press Enter

Step 2: Install and Configure IBM Planning Analytics Workspace
Important Note: Before starting the Installation of IBM Planning Analytics Workspace, disable the Microsoft’s Hyper-V and restart windows.
Step 2.1: Disable Microsoft’s Hyper-V
Post installation of Docker Toolbox, we need to disable Microsoft’s Hyper-V in windows 10Pro. To disable Microsoft’s Hyper-V follow below steps:
- Go to
Start--> Control Panel --> Programs and Features --> Turn on windows features on or off - Un-check
Hyper-V. Once Hyper-V is enabled restart windows.
Step 2.2: Download IBM Planning Analytics Workspace
IBM Planning Analytics Workspace software (paw_2.0.47_mp_ml.tar.gz) can be downloaded from IBM Passport Advantage portal. Make sure that you download software for windows. Unzip paw_2.0.47_mp_ml.tar.gz
Step 2.3: Configure IBM Planning Analytics Workspace
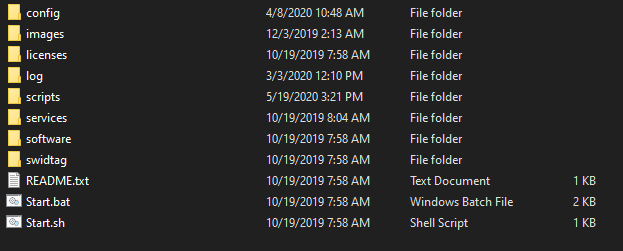
- Create
folder C:\paw. Folder can be created in any drive as available in your desktop. - Copy all the files extracted in
step 2.1intoc:\paw - Launch
PowerShelland configurenetipinterfaceusingset-netipinterface
Note:
TheGet-NetIPInterfacecmdlet gets an IP interface, including IPv4 and IPv6 addresses, and the associated address configuration for the IP interfaces. Without parameters, this cmdlet gets all of the IP interface properties on the computer, including virtual interfaces and loopback interfaces
TheSet-NetIPInterfacecmdlet modifies an IP interface, including Dynamic Host Configuration Protocol (DHCP), IPv6 neighbor discovery settings, router settings and Wake On LAN (WOL) settings.
- Type the
get-netipinterfacecommand and press Enter.
Swap theInterfacemetric of Index 10(vEthernet)withInterfacemetric of Index 21(Wi-Fi)
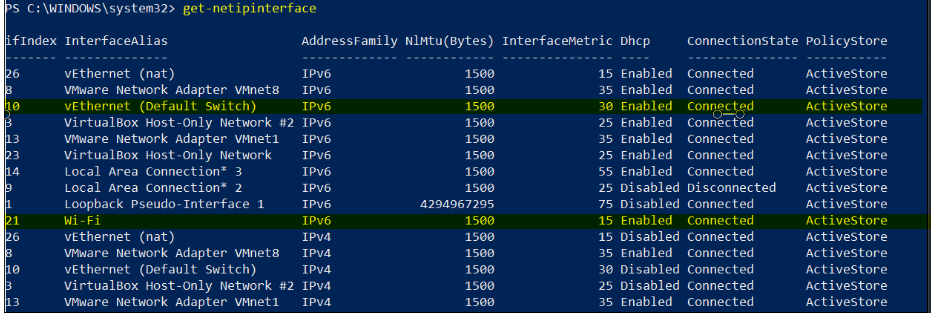
- Type the
set-netipinterface -interfaceindex 10 -interfacemetric 15command and press Enter. - Type the
set-netipinterface -interfaceindex 21 -interfacemetric 30command and press Enter.


- Type the
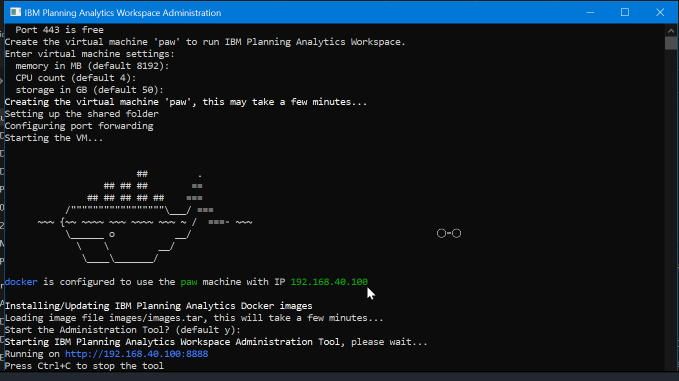
docker-machine start pawcommand and press Enter. - Now, launch
C:\paw\Start.bat
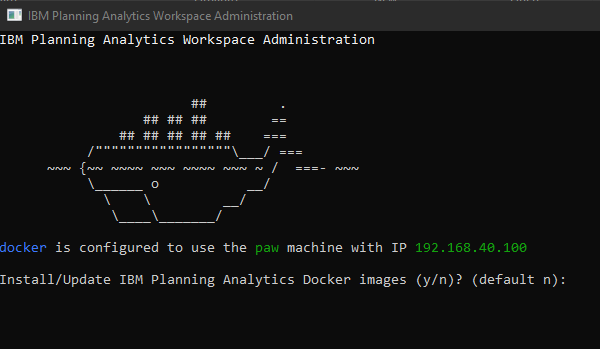
docker-machine paw is already started you will be prompted directly to install IBM Planning Analytics docker images- Type
YtoInstall IBM Planning Analytics Docker images. This will install all the required images for workspace to run.

- Type
YtoStart the Administration Tooland press Enter.
This will start and launch IBM Planning Analytics Administration Tool in your default browser.
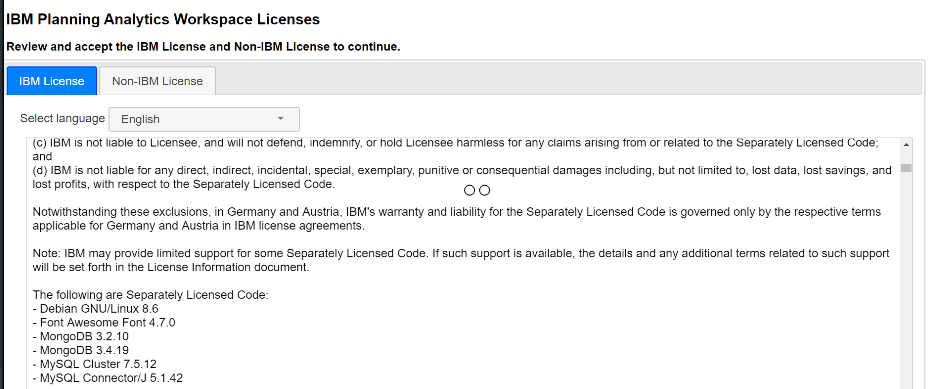
- Click
AcceptIBM License and Non-IBM License. This will LaunchIBM Planning Analytics Administration Tool --> Configuration section
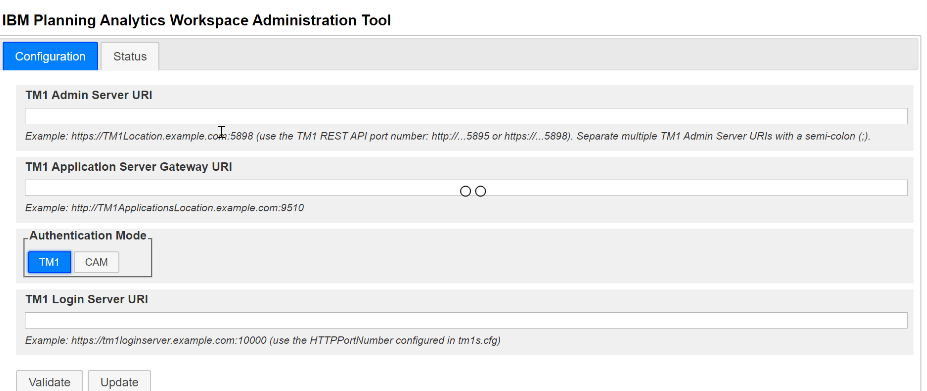
Configuration Details:
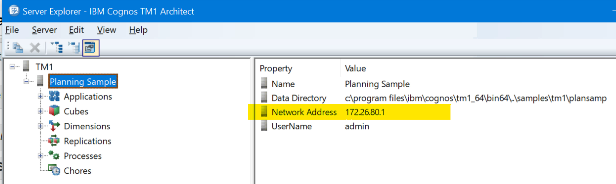
- Launch
TM1 Architect --> Login to Planning Sampleandget the IP Address of the Data Server
Tip: In the example, Planning Sample Data server Network Address is used for configuring IBM Planning Analytics workspace. You can use any data server for configuration.
- TM1 Admin Server URI: http://172.26.80.1:5895
Tip: Use Port number 5895 for configuring HTTP and 5898 for configuring HTTPS
- TM1 Application Server Gateway URI: http://172.26.80.1:9510
Get the HTTPPortNumber from tm1s.cfg file of Planning Sample data server

- TM1 Login Server URI: http://172.26.80.1:12354
Click Validate to successfully validate the configuration
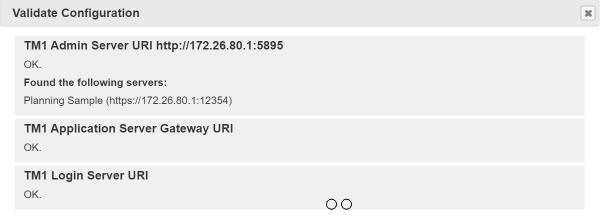
Click Update to successfully update the configuration and start the services.
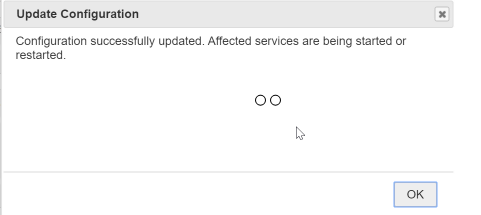
Select Status Tab and click Refresh services.
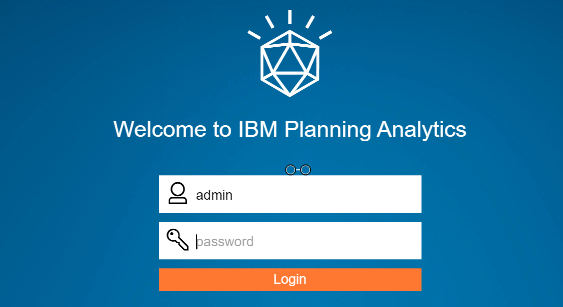
Step 3: Launch IBM Planning Analytics Workspace Portal
Type URL: http://192.168.40.100 in Google Chrome or Firefox browser to start IBM Planning Analytics Workspace.
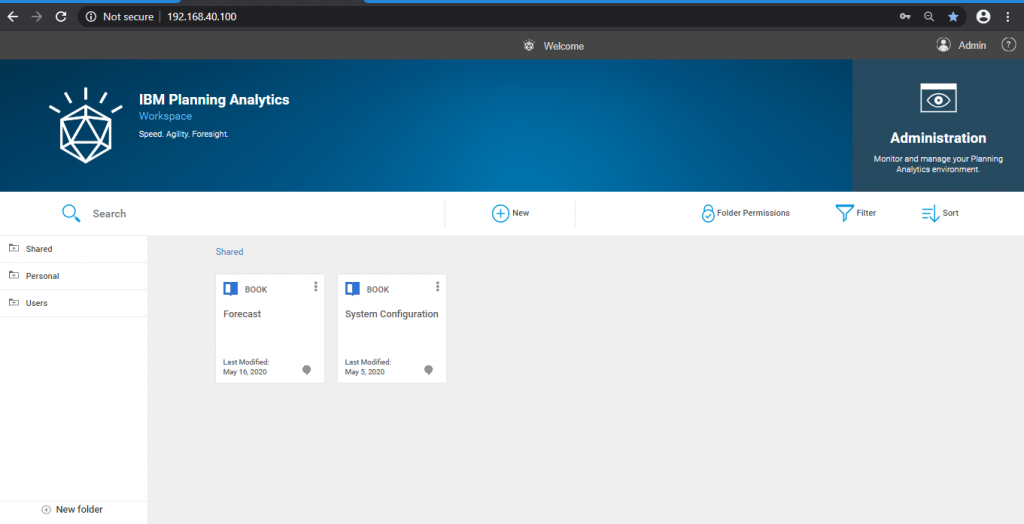
This completes our installation and configuration steps for IBM Planning Analytics Workspace.
Hope you enjoyed reading 🙂
Your style is really unique compared to other folks I’ve read stuff from. Thank you for posting when you’ve got the opportunity, Guess I will just book mark this site.|
Thank you Julianne
Hello to all, the contents existing at this web page are genuinely awesome for people experience, well, keep up the good work fellows.|
Thank You Shayla, we are happy that you found our content useful. We shall keep posting more new courses and new topics in blog. Keep reading.
You actually make it seem so easy with your presentation but I find this matter to be really something which I think I would never understand. It seems too complicated and very broad for me. I’m looking forward for your next post, I’ll try to get the hang of it!|